


How to send Custom Bell Notification from Flow
- smartforceit
- Jan 2, 2025
- 2 min read

Salesforce Flows provide a powerful way to automate business processes and engage users. One of the exciting features of Flows is the ability to send Bell Notifications to users. In this blog, we'll explore how to send Bell Notifications to users using Salesforce Flows.
Here's a step-by-step guide on how to send custom notifications from Flow in Salesforce:
Step 1: Create a Custom Notification
1. Navigate to “Setup” in Salesforce.
2. Search for “Custom Notifications” and click on it.
3. Click “New Custom Notification”.
4. Fill in the required fields:
- Label: Enter a unique label for your custom notification.
- Name: Salesforce will auto-generate a name based on your label.
- Description: Provide a brief description of your custom notification.
5. Click “Save”.
Step 2: Create a Flow
1. Navigate to “Setup” in Salesforce.
2. Search for “Flows” and click on it.
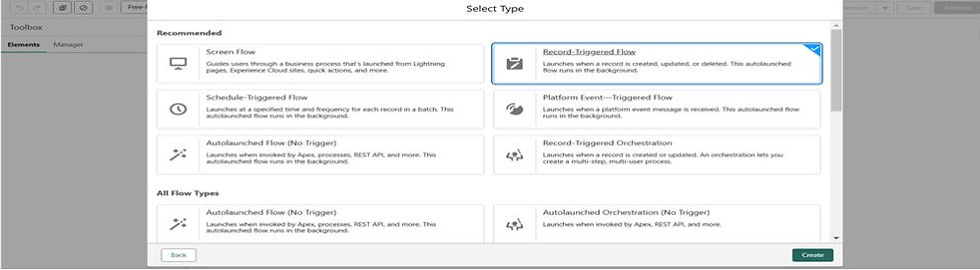
3. Click “New Flow.”
4. Choose the “Record-Triggered Flow” option.
5. Configure the flow trigger:
- Object: Select the object that will trigger the flow (e.g., Account, Contact,Lead etc.).
- Trigger Type: Choose the trigger type (e.g., When a record is created, updated, etc.).
6. Click Save.
Step 3: Add a Custom Notification Element
1. In the Flow Builder, click the “+” icon to add a new element.
2. Search for “Custom Notification” and select it.
3. Configure the custom notification element:
Custom Notification: Select the custom notification created in Step 1.
Recipient: Choose who will receive the notification (e.g., the record owner, a specific user, etc.).
Subject: Enter a subject line for the notification.
Body: Enter the notification body.
4. Click “Save”.
Step 4: Connect the Custom Notification Element
1. Connect the custom notification element to the flow trigger element.
2. Ensure the flow is activated and saved.
Step 5: Test the Custom Notification
1. Trigger the flow by creating or updating a record that meets the flow's trigger criteria.
2. Verify that the custom notification is sent to the intended recipient.
By following these steps, you can send custom notifications from Flow in Salesforce.
Scenario: When the Lead is created owner should receive a Bell notification.
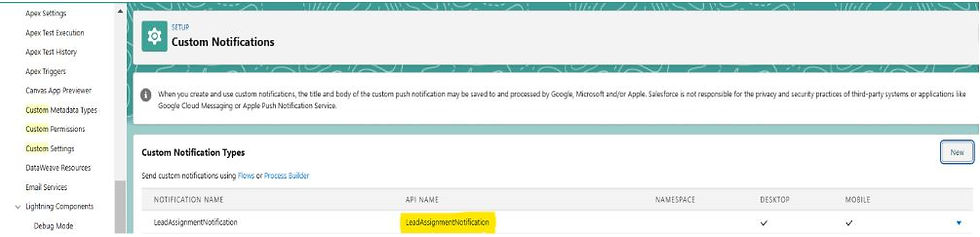
Step1: Create Custom Notification “LeadAssignmemtNotification”

Step2: Create Flow” leadCreationsendNotificationtoOwner”
Record Triggered flow created.
Flow configuration:
Object: Lead
Configure trigger: A record is created.

Step 3: Add a Custom Notification Element
CustomNotification Api name “LeadAssignmentNotification”is configure to the DeveloperName.

Recipient ID collected.

Step 4: Connect the Custom Notification Element
Create action “sendCustomNotificationtoleadOwner” and customize the notification message.

Activate the flow. Finally, version of the flow looks like this.

Step 5: Test the Custom Notification
Notification gets to the owner when the lead is created.


Comments