Mastering Product and Attribute Management in SAP CPQ
- Feb 24, 2025
- 18 min read
In today's fast-paced business environment, the ability to efficiently configure, price, and quote (CPQ) products is crucial for staying competitive. SAP CPQ (Configure, Price, Quote) is a powerful tool that streamlines this process, enabling businesses to offer customized solutions to their customers. This blog post delves into the intricacies of product and attribute management in SAP CPQ, providing a step-by-step guide to help you master these essential tasks.
Introduction to SAP CPQ
SAP CPQ is designed to simplify the complex process of configuring products, setting prices, and generating quotes. It enables businesses to offer tailored solutions, enhancing the overall sales experience. One of the key aspects of SAP CPQ is its ability to manage products and their attributes effectively.
Creating a Product in SAP CPQ
Step 1: Log in to SAP CPQ
Begin by accessing your SAP CPQ instance using your credentials.
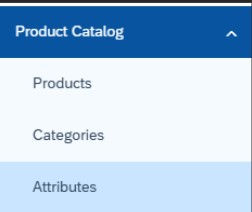
Step 2: Navigate to the Product Catalog
Head to the Product Catalog section from the main menu.

Step 3: Create a New Product
Click on the Add New Product button and fill in the following details:

General Fields
Name (required): The name of the product.

System ID (required): Generated automatically from the product's name with the addition of _cpq.

Active: Selected by default. Only active products are available in the Catalog.

Display Type: The configuration level of the product.

Product Type: If a group of products with the same specifications (e.g., hardware, software) isn’t available, click the Add New button next to the dropdown list to create a new Product Type.

Part Number: Dynamic part numbers can be created by entering an expression in the Part Number field. You can also use the Formula Builder to create an expression.

Unit of Measure: This field enables you to quantify and track products. Enter a three-character ISO code, for example, EA (each), PCE (piece), PK (pack).

Description: Optional description of the product.

Image: Visual representation of the product.

Alt Text: Textual replacement of the Image, recommended for persons with impairments.

Dynamic Description: Displayed to the user in a quote. You can create it by combining text and tags.

Category (required): The category with which the product is associated

Permissions and Effectivity Dates
Visibility: If the Visible to Everyone option is enabled, all users can see the product. If not, only the selected user types, companies, brands, etc., can see it.
Effectivity Dates: The Start Date and End Date determine the period during which the product is available.

The visibility permissions defined for the category a product belongs to are not automatically propagated to the product. Instead, you can define the permissions for the individual product in this section. If the Visible to Everyone option is disabled, you can manually apply the permissions defined for the category to the product by clicking Apply Category Permissions.

Products for which a user has restricted visibility don't display in the product search results for that user. Furthermore, users can’t add those products to the quote. For example, if a product is visible to everyone and its category is visible only to a Sales Manager, the logged-in Sales Representative will not be able to view the product because it’s part of a category for which they don’t have visibility rights.
Additional Product Data
These options and fields are optional and offer a finer layer of product personalization:
Product Version: There can be only one active product version. The active product version can't be deleted.

External ID: Used for referencing the product with the ID from an external system.

UPC (Universal Product Code): Can be used for the European Article Number (EAN) or International Standard Book Number (ISBN).

MPN (Manufacturer Part Number): Needs to be used if the manufacturer part number is different from the part number used to mark the product (when selling through channels).

Inventory: A descriptive field used for storing additional information about the product. The entered data doesn’t influence the product in any way but can be used in formulas.

Lead Time: Used to describe how long it takes to get the product.

Family Code: The family code is the key to validating that a consumer has purchased a qualifying family of products.

Product Weight: The label of this property depends on the value of the application parameter Unit of Measurement. The value of the product property is one of the following: Product Weight in GRAMS, Product Weight in KGS, Product Weight in LBS.

Large Image: Displayed on the user side when you visit the product's Details page or modal, only when the Large Image tag is used in the Product Details templates.

Long Product Description: A more detailed description can be added here, if needed.

User can enter quantity: Determines whether users can enter quantity for this product. Enter 1 to unconditionally allow users to enter quantity or enter an expression to only allow it under certain conditions.

Note: The product’s quantity can be changed with a special attribute called Item Quantity. If this attribute exists, then the system uses its value to determine the quantity of the main item in the quote.
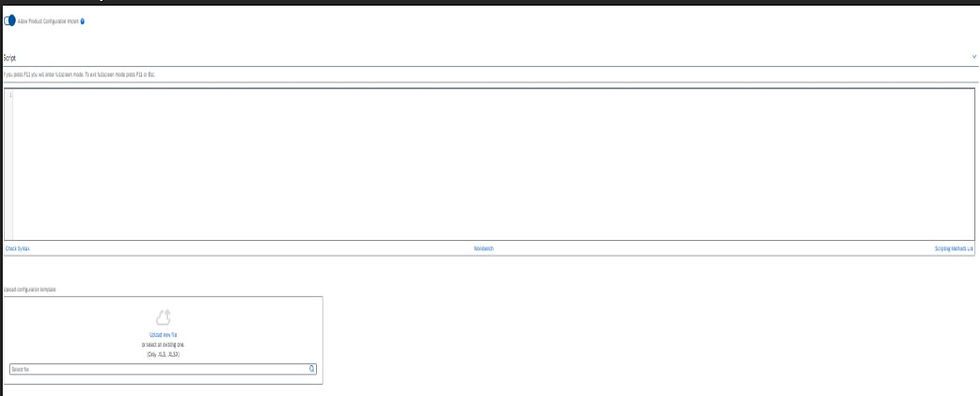
Allow Product Configuration Import: Enables import of product configuration via an Excel file. An IronPython script needs to be written to read the Excel file and assign values from the file to the product attributes.
For controlling whether to display a configuration template, you can use the application parameter Show product configuration template. This parameter can be found in Setup > General > Application Parameters > Configuration Tab.
Step 4: Define Product Attributes
Attributes are the characteristics that define a product. They allow for customization based on customer preferences. Here’s how to create and manage attributes in SAP CPQ:
Product Attributes Tab
You can add attributes to individual products directly from the product configuration in Setup. It is also possible to create new attributes there, and they will automatically be available in the list of all attributes.
Define New Attribute: By clicking this, you will be redirected to the Attributes creation screen. From there, you can follow the attribute creation procedure.
Add Attribute: A popup displays with a list of available attributes, and you can select the attribute you wish to use in the product.

We recommend avoiding duplicate attributes associated with a product, as this may lead to problems with later processes such as importing products and trying to fetch the attribute names in a formula.
Introduction to Attributes
Attributes provide users with additional preferences they can choose from when configuring products to be added to a quote. For example, if the configurable product is a Desktop Computer, its attributes can be RAM Memory, Hard Drive, and Processor. Attributes usually contain values. In the case of the RAM Memory attribute, the values can be 32GB and 64GB. Attributes can be used for:
Calculations: Formulas can be added as attribute values to perform calculations.
Free input by the user: Users can populate attribute values in the Configurator.
Display of text to the user: Certain information added to attribute values during attribute creation can be displayed to users in the Configurator.
Attributes can be created, edited, copied, and viewed in Setup > Product Catalog > Attributes. They can also be created in the Attributes tab during the editing or creation of a configurable product. For bulk operations, you can use the Import/Export Setup section.
Creating Attributes (General Procedure)
Navigate to the Attributes Section:
Go to Setup > Product Catalog > Attributes.
Add a New Attribute:
Click on the Add New Attribute button.
Fill in General Fields:
Name: The name of the attribute.

Code: A unique code for the attribute.

Description: A brief description of the attribute.

Type: Select the type of attribute (e.g., text, number, dropdown).
Attribute Types

1. Container
A container attribute is used to group other attributes together. This is useful for organizing related attributes and managing them as a single unit.
2. Autocomplete - Sourced from a Custom Table
This attribute type allows users to select values from a predefined list that is sourced from a custom table. It is useful for providing a controlled set of options.
3. Autocomplete - Sourced from a Quote Table
Similar to the custom table, this attribute type sources its values from a quote table, allowing for dynamic and context-specific options.
4. Measurement
Measurement attributes are used for capturing measurements such as length, width, height, or weight. They can be configured to accept specific units of measurement.
5. User Selection
This attribute type allows users to select from a predefined list of values. It is one of the most common attribute types used for product characteristics.
6. User Selection with Attribute Quantity Input
This type extends the basic user selection attribute by allowing users to specify quantities for each selected value.
7. User Selection with Quantity Inputs for Each Attribute Value
Similar to the previous type, but it allows for specifying quantities for each individual attribute value, providing more granular control.
8. User Input or Computed - Date
This attribute type allows users to input dates or have dates computed based on other inputs or conditions.
9. User Input or Computed - Number
Allows users to input numerical values or have them computed. This is useful for attributes like price, quantity, or any other numerical data.
10. User Input or Computed - String
Allows users to input text values or have them computed. This is useful for attributes like product names, descriptions, or any other textual data.
11. Contract Duration
This attribute type is used to specify the duration of a contract. It can be configured to accept various time units such as days, months, or years.
12. Billing Cycle
Used to define the billing cycle for a product or service. It can be configured to accept values like monthly, quarterly, or annually.
13. Dynamic Value Attributes
These attributes can change dynamically based on other selections or external data. They are useful for creating highly customizable and responsive product configurations.
Define Attribute Properties:
Values: Specify the valid values for this attribute. For example, if the attribute is "Color," the values might be "Red," "Blue," "Green," etc.
Default Value: Set a default value if applicable.
Visibility: Define where this attribute will be visible (e.g., in the product configuration, in the quote).
Mandatory: Specify if the attribute is mandatory or optional.

Save the Attribute:
Once all details are filled in, save the attribute.
Basic Scripting Elements for Attributes
IronPython scripts can be used to control the appearance and behavior of attributes in certain situations. This allows for advanced customization and dynamic behavior based on user inputs or other conditions.
Attribute Quantity
Attribute quantity and its values can be managed in multiple ways. You can define formulas to calculate quantities based on other attribute values or user inputs.
Import/Export Attribute Translations
To translate multiple attributes via one Microsoft Excel file, you can export individual attributes or an entire attribute type, update attribute translations in the resulting Microsoft Excel file, and import the file back to SAP CPQ. The translation is possible for all languages except the default language of a tenant.
Attribute Import
In the Attribute Import page, you can export/import attributes in several ways. This is useful for bulk updates or migrations from other systems.
Editing Attributes within Products
It's possible to define attribute behavior within each product separately. None of these options are mandatory.
Note: Not all options presented in the following tables refer to all attribute types.
Display as: Determines how the attribute is displayed in the Configurator.

Custom Label: Replaces the default attribute name for this product only. Formula Builder can also be used to retrieve the label from other places in the application.

List as Line Item: Attributes marked as line items are listed as separate items in the quote and can be configured independently from the products.
Required: Determines whether it is mandatory to select an attribute value to complete the configuration.

Hint: Creates a tooltip next to the attribute label. The hint isn’t displayed if the selected attribute display type is Hidden Calculated.
The following options are displayed only if the List as Line Item option is active:

Description: What you enter here will be displayed below the line item when it is configured.

User Can Enter Quantity: Users can enter the quantity of child items independently of the parent item quantity. If enabled, you can create a formula with conditions that determine which permission groups can edit quantity. If both this toggle switch and Inherit Quantity from Parent are enabled, the line-item quantity will be inherited from the parent product, and users can’t enter quantity.

Inherit Quantity from Parent: Line item inherits the quantity of the parent item. If enabled, you can create a formula to expand the basic conditions (yes/no).

Rank within the Cart: If there are several items, their rank determines the order in which they are displayed in the Configurator.

Additional Attribute Definition
In this section, you can define optional attribute values, which have an impact on the attribute’s behavior in the Configurator.

Width: Determines how much space the attribute takes up in the Configurator. The value entered in this field isn't applied in the Configurator if the Responsive Design is used. In the Classic Design, width is applied to the following attribute display types: Free Form, Exact Match w/ Otherwise Option, Free Form, Exact Match, Free Form, Match Lower, Free Form, Match Upper, Free Form, Set Match Lower, Free Form, Set Match Upper, Free Input, No Matching.
Height: Determines how many rows the attribute takes up in the Configurator. The value defined indicates the number of rows and not the number of pixels. The value entered in Height is only applied in the Configurator for the following attribute display types: Free Form, Exact Match w/ Otherwise Option, Free Form, Exact Match, Free Form, Match Lower, Free Form, Match Upper, Free Form, Set Match Lower, Free Form, Set Match Upper, Free Input, No Matching.
Formula for Calculating Attribute Quantity: You can add a formula that calculates the attribute quantity during configuration. For example, the quantity of one attribute can be conditioned by the quantity of another one. The maximum allowed number of characters is 2500.
Custom Range Error Text: You can define an error message which displays if users enter an incorrect value.
Valid Input is From/To: These options are displayed for container attributes. You can build formulas which determine the input validity period.
Spans Across Entire Row in Configurator: The attribute stretches across the entire row, so no other attributes are positioned next to it.
Show One Time Price: Enabling this option shows the one-time price of the attribute in the Configurator. By default, they are disabled, so the price of the product is the only one displayed.
Show Recurring Price: Enabling this option shows the recurring price of the attribute in the Configurator. By default, they are disabled, so the price of the product is the only one displayed.
Triggers Execution of Rules: When the attribute value is changed in the Configurator, a product rule is executed. Applicable only if rules are attached to the product.
Refresh Configurator on Change: Every time a user selects an attribute value, the Configurator is refreshed.
Start Date/End Date: The dates between which the attribute is available on the product.
Inherit Product Type from: You can select a product that the attribute will inherit the product type from, even though by default the main item serves as a source of the product type.
Manage Container Events
If the attribute is a container, this panel is displayed, and you can add scripts to the following events which will be triggered once the listed events occur:

Script on new row added
Script on row copied
Script on row deleted
Script on cell edited
Types of Attribute Triggers
There are three main types of attribute triggers in SAP CPQ:

Change Trigger: Activates when the user changes the previously selected value within the attribute. This is useful for scenarios where a change in one attribute should automatically update or reset another attribute.
Select Trigger: Activates when the user selects any value from the attribute without a previous selection. This trigger is ideal for initializing attributes when a selection is first made.
Reset Trigger: Activates when the user deselects a previously selected value within the attribute. This ensures that attributes are reset to their default state when a selection is removed.
Attribute Values

Attribute values are automatically retrieved from the attribute's definition and displayed in the table of values.
Alternatively, you can add attribute values manually or you can add one of the products as a source of attribute values.
Add Values Manually: If selected, a table in which you can enter values, value code, and rank displays.
Add Values from Product List: If selected, a table with products displays, and you can select products from which you will source the values.
After you make the selection of values, they will be displayed in the table below. You can use both manually entered values and product values in one attribute. Values need to be selected in the Display to User checkbox to appear in the Configurator.
You can add long descriptions for configurable products to enable the display of more details of attribute values. For more information, see Long Description for Configurable Products.
Uses of Attributes
Attributes play a crucial role in defining and customizing products in various ways:
Product Configuration: Attributes allow customers to select different options for a product. For example, a laptop might have attributes for RAM size, storage capacity, and color.
Pricing Rules: Attributes can influence the pricing of a product. For instance, selecting a higher RAM size might increase the price of a laptop.
Guided Selling: Attributes help in guiding the sales process by presenting relevant options to the customer based on their selections.
Product Rules: Attributes can be used in product rules to enforce compatibility or exclusion rules. For example, if a customer selects a specific processor, only compatible RAM sizes will be shown.
Reporting and Analytics: Attributes provide valuable data for reporting and analytics, helping businesses understand customer preferences and trends.
Advanced Topics
Dynamic Attributes: Attributes that change based on other selections or external data, useful for creating highly customizable and responsive product configurations.
Attribute Dependencies: Define relationships between attributes to ensure valid configurations. For example, selecting a specific processor might limit the available RAM options.
Attribute-Based Pricing: Attributes can influence the pricing of a product. Pricing rules can be defined based on attribute values to calculate the final price dynamically.
Localization and Translation: Attributes and their values can be localized to support multiple languages and regions.
Setting Pricing Information
Step 5: Set Pricing Information
Navigate to the Pricing tab, define the base price of the product, and add any pricing rules or conditions if applicable (e.g., volume discounts, regional pricing).

Types of Pricing in SAP CPQ
Custom Pricing

Custom Pricing allows you to define a base price for a product and use formulas to calculate the final price. This method is highly flexible and can accommodate various pricing strategies.
Base Price: A Base Price can be entered for the product. If the price consists of more than just the base price plus the sum of the attribute prices, then an expression can be entered through the Pricing Formula.
Pricing Formula: The product price or main item price is calculated by computing the pricing formula if it exists. Otherwise, if the formula is left blank, the product price is equal to the Product Price field plus a sum of individual attribute prices, except for attributes that are marked as line items. Attributes marked as line items display their own price and aren't included in the main item price.
Recurring and Non-Recurring Prices
When the checkbox Use recurring price and cost has been activated under Setup > General > Application Parameters, a new field for Base Recurring Price is added. This allows for the definition of recurring prices, which can be retrieved via CTX tags and scripting.
BaseMRCListPrice Object: Available in Quote.CurrentItem in the CTX tag wizard, it has the following properties: DefaultDecimal, DefaultDisplay, MarketDecimal, and MarketDisplay.
Scripting Properties: In scripting, there are two properties available: BaseMRCListPrice and BaseMRCListPriceInMarket.
If a product has both the recurring price and the base recurring price defined in the Setup, the CTX and scripting properties retrieve the recurring price. However, if the recurring price is not defined, the properties retrieve the base recurring price.
Product Cost Formula
The product cost or main item cost is calculated by computing the cost formula and adding all attribute costs for attributes that aren’t marked as line items. Attributes marked as line items display their own cost and aren't included in the main item cost.
Cost Field: You can enter an expression in the Cost field to determine the cost of the product.
Practical Example
Consider a scenario where you are introducing a new line of monitors. You can set a base price for the monitor and use a pricing formula to adjust the price based on attributes like screen size and resolution. If the monitor has a recurring maintenance fee, you can define a base recurring price and retrieve it using CTX tags and scripting.
2. Pricebook Lookup
Pricebook Lookup is used to retrieve prices from predefined pricebooks. Pricebooks are configurable data tables that define product prices for specific markets. They link products with their prices and enable flexible and accurate price calculations.
View Prices: When the Pricing Mechanism is set to Pricebook Lookup, pricing fields are hidden, and a link View Prices is shown. Clicking on this link brings up a popup window showing all pricebooks and all records for this part number in those pricebooks.

Step 6: Configure Product Rules
Product rules help in defining how the product behaves in different configurations. Go to the Rules tab and add rules such as compatibility rules, inclusion rules, or exclusion rules.
Introduction to Product Rules and Messages
The Product Rules and Messages tab in SAP CPQ is where you can define various rules and messages that control the configuration of products. These rules ensure that users can only create valid configurations based on predefined criteria. The tab includes:

Formula Rules
Attribute Triggers
Simple Rules
Product Messages
Types of Rules
1. Formula Rules
Formula rules are used to create complex conditions and actions using SAP CPQ tags. These rules can be customized using the Formula Builder, which provides a user-friendly interface for creating and managing rules. Formula rules are ideal for scenarios where multiple conditions need to be evaluated to determine the outcome.

2. Attribute Triggers
Attribute triggers are used to perform actions based on changes to attribute values. For example, if a user selects a specific attribute value, a trigger can automatically update other attributes or enforce certain constraints.

3. Simple Rules
Simple rules consist of straightforward IF-THEN statements that define conditions and actions. These rules are easy to create and manage, making them suitable for basic configuration requirements.

4. Product Messages
Product messages are used to display information or warnings to users during the configuration process. These messages can guide users, provide additional information, or alert them to potential issues with their selections.

Creating Rules with Formula Builder
The Formula Builder is a powerful tool within SAP CPQ that allows non-programmers to create and customize rules using a graphical interface. It supports the creation of conditions and actions using prepopulated options and tags. The Formula Builder also includes a built-in syntax checker to ensure the accuracy of the rules.
Order of Execution
When modeling a product, it's important to understand the order in which different actions are executed. This knowledge helps prevent conflicts and ensures that the desired outcomes are achieved. The system runs these methods in the following order:
Triggers
Simple Rules
Formula Rules
Any time a user makes a selection or a product is loaded, these processes are run in this order. For example, if a trigger selects the color Red and a rule selects the color Blue, Blue will be the final selection regardless of the rule ranking.
Practical Examples
Example 1: Disallow Attribute Dependency Rule
Imagine you have a laptop product where Processor D requires at least 8 GB of memory. You can create a rule that restricts users from selecting 2 GB or 4 GB of memory when Processor D is selected. This ensures that the configuration remains valid and prevents users from creating incompatible configurations.
Example 2: Mandatory Attribute Dependency Rule
For a configurable product like a car, you might want to ensure that if a user selects a specific engine type, they must also select a compatible transmission type. A mandatory attribute dependency rule can enforce this requirement, guiding users to make valid selections.
Step 7: Product Script Tab
Introduction to the Product Scripts Tab
The Product Scripts tab enables you to define scripts for a product and specify the events that trigger their execution. You can verify the execution of the script in the Log, ensuring that the desired actions are performed correctly.

Local Scripts
Local scripts are designed to be used on specific products for which they are created. They are defined and managed within the product's configuration.
Creating a Local Script
To add a new local script, follow these steps:
Navigate to the Scripts Tab:
Go to Setup > Product Catalog > Products > Scripts.
Add a New Script:
Click on Add Script > New Script.

Fill in the Script Details:
Name (required): Enter the name of the script.
Active: Determine whether the script is currently executed when events occur.
Description: Optionally, provide a detailed description of the script.
System ID: This field is automatically populated when the script name is entered.
Start Date/End Date: Specify the dates between which the script will be executed.
Force Proxy Generation: Select this checkbox to load and refresh the WSDL web services. This needs to be selected only once when the script is saved for the first time.
Script: Enter the IronPython script. For example, you can add a script Log.Write("Add item", "Item added"). This script logs an entry when an item is added to a quote.
Check Syntax:
Use the Check Syntax button to ensure that the script is valid.
Workbench:
The Workbench is a useful tool for debugging and developing scripts.
Scripting Methods List:
Displays a list of relevant scripting methods.
Events:
Select an event that triggers the script execution.

Example of a Local Script
Consider a scenario where you want to log an entry every time an item is added to a quote. You can create a script with the following details:
Name: Log Item Addition
Script: Log.Write("Add item", "Item added")
Event: Adding an item to a quote
Once you’ve clicked Add to Quote in the Configurator, go to the Log to see if the script was executed. The Log Description field will be populated with an "Item Added" update.
Global Scripts
Global scripts are universal in nature and can be attached to multiple different products. They are defined once and can be reused across various products.

Attaching a Global Script
To attach a global script to a product, follow these steps:
Navigate to the Scripts Tab:
Go to Setup > Product Catalog > Products > Scripts.
Add a Global Script:
Click on Add Script > Global Script.
Select the Global Script:
In the Global Script dropdown, select the global script you wish to attach to the product.
Select the Event:
Choose the event that will trigger the script.
Step 8: Product Layout
Products Layout Tab

In this tab, you can customize the position of attributes within the Configurator and the Responder.
To change the position of attributes:
Drag and drop the attributes as needed.
Use the Configuration Preview to see the product's appearance when configured.
In the Configuration layout:
Attributes can be dragged and dropped to another tab.
You can add global tabs created in the Product Catalog Tabs and define their visibility directly in the Configuration layout.
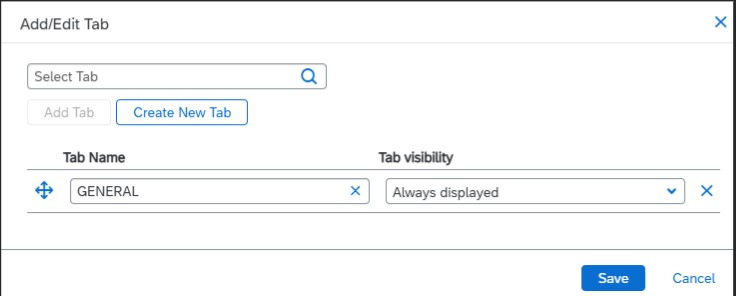
To add a new tab:
Click Add/Edit Tab.
A pop-up will appear.
Click Add New Tab.

In the Tab Name field, enter the name of the tab. If the tab exists, it will appear in the dropdown list as you type.
In Tab visibility, define when the tab will be visible.

The tab name will display in the pop-up.
Click Save.
To rank tabs:
Drag and drop them to the desired order.
Step 9: Save and Publish the Product
Once all the details are filled in, save the product and publish it to make it available for quoting.


Comments